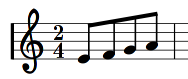
NtEd places the beams automatically depending on the note length and the time signature. This works
in most cases. But sometimes the user wishes costumized beams. To change the beaming
use a special button on toolbar which changes its appearence depending of whether there
is a selection rectangle or not (see Select a block). If there is no selection rectangle the button isolates a currently beamed
note ( ).
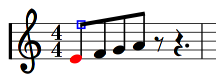
To isolate make sure NtEd is in edit mode (see The 3 modes). Select a beamed note by left clicking it:
).
To isolate make sure NtEd is in edit mode (see The 3 modes). Select a beamed note by left clicking it:
Then press the isolate button ():
The note is isolated.
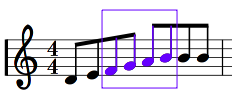
To connect some notes with a beam, select them as described in Select a block:
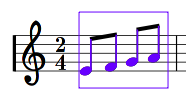
The button changes its appearence ( ).
Press the button and NtEd connects the notes by a beam:
).
Press the button and NtEd connects the notes by a beam:
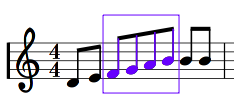
Note! This function can break beams as well, if the selection rectangle crosses an existing beam:
This results in:
Tip
Instead of pressing the button you can use Ctrl+J independent of the button's appearence.
To change the stem direction make sure NtEd is in edit mode (see The 3 modes) select the first or the last note with left mouse button and press the change stem dir button
( ).
).
Tip
Instead of pressing the change stem dir button
() you can simply
press Ctrl+F twice.
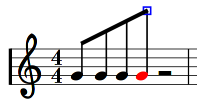
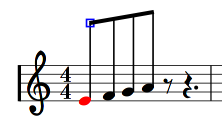
NtEd computes the beam position and slope depending on the position of the beamed notes. This works in most cases. But sometimes the user wishes to change the beam parameters. To change the beam position make sure NtEd is in edit mode (see The 3 modes) and select the first note with left mouse button:
The stem has a handle represented by a small blue square. Select this handle with left mouse button and move it up or down. The beam follows this motion:
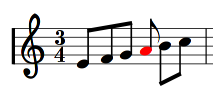
To change the beam's slope select the last note with left mouse button:
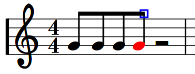
The stem has a handle represented by a small blue square. Select this handle with left mouse button and move it up or down. The slope changes according to this motion: